 |
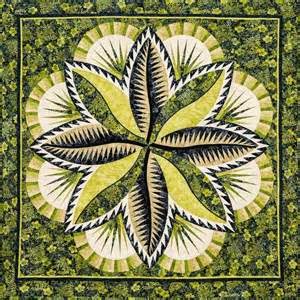
| Quilt from Fire Island Hosta pattern cover |
Day 1: Cutting and Piecing - The Bags
Day 1 was actually Tuesday, October 7. I started working sometime between 9 and 9:30 am. I worked straight through until 2 pm then I probably worked an additional hour here and there the rest of the afternoon. This is a total of about 6 hours.
This quilt uses 8 bags to store the fabric, templates and foundation papers. Start with the newsprint papers in the package. In the instructions on pages 2 and 3 in the 8 boxes you will find a breakdown of which pieces go into which bag. Cut out all of the newsprint papers and place the templates/foundations in the bags as described in the instructions. Each bag is a unit or part of the quilt top. The foundations, templates and fabric for each unit are placed in the designated bag.
The next step is to cut the fabrics and put them in the bags. The instructions on page 3 tell you to sub-cut strips of fabric and place them in the bags. I did not do this because I used fewer fabrics than the pattern called for and wanted to make sure I was cutting the correct fabrics. I went straight to the cutting instructions on page 5 for Bag #1. I continued cutting fabric for Bags #1 through 6. Bags #7 and 8 are mostly large background pieces and are not foundation piecing.
I started and nearly completed piecing Unit FL-5 in Bag #5. The pattern calls this the Clamshell and these are the 8 fan units with the white background in the photo above.
This photo shows Unit FL-5 prepared and ready for me to sew the final piece of fabric. I got this far on day one.
The instructions say to piece unit FL-5 on Bag #6 next but I chose to skip it for now. This is my cutting space. Before is stopped sewing for the day I set up the fabric for piecing the FL-3 and FL-4 units in Bags #3 and 4. These units are called the Feathered Leaf Border and they form the border around the large center leaves.
Here you can see the FL-3 and FL-4 units ready to start piecing tomorrow. the fabric sections are stacked numerically and the foundation papers are placed in front of the stack.
Day 2: Piecing the Feathered Leaf Border
Today (Wednesday, October 8) I had many interruptions and my best guess of quilting time is about 4 hours. I started by preparing the foundations with fabric sections 1 and 2.
I use a large square ruler to hold my paper piecing. I move the ruler with the pieces on it from cutting board to sewing machine to ironing board and back to the cutting table.
The feathered leaf border papers are placed on top of the already prepared clamshell papers. When I was piecing Golden Harvest I used two long rulers and made a double decker to bring to the sewing machine. you have to be careful you don't drop it along the way!
Here are the pieces safely at the sewing machine.
Trimmed Clamshell
Feathered Leaf Border about midway in the sewing process.
Both Feathered Leaf Border sections ready to sew. FL-4 is shorter than FL-3.
FL-4 before and after trimming. I always trim the sections as I complete them.
The reverse side. I trim so the outside line remains on the piece.
The FL-3 before and after.
Back of FL-3
Before stopping for the day I prepared FL-1 and FL-2 from Bags #1 and 2. These are the 4 Spikey Leaves. FL- 1 is the larger side (40 sections) and FL-2 (31 sections)is the smaller. There will be more trips to the sewing machine but there are only 4 of each.
The Fire Island Hosta pattern is available in two sizes:
|
|
Happy Quilting!
Carol Thelen


