


In July of 2019, after a subscriber asked me about the lining, I added a video I found that explained the lining a little better. It is included later in the tutorial.
In This Tutorial
Here are the steps for making a Mondo Bag:- Gather your supplies and fabric
- Sew outer fabric panels
- Assemble outer shell
- Assemble lining shell
- Attach handles
- Stitch outer shell to lining shell
- Turn and topstitch
Before you start preparations for making your Mondo Bag, take about 10 minutes to watch this video from Quiltsmart. It’s a very good overview of the process.
A few things about the video:
The interfacing used in the video is By Annie’s Soft and Stable. As you saw in the video, it stands up on its own. You can choose that product if you like your bag to stand up. I used Fusible Fleece which is available in various thicknesses. Be sure you are purchasing a fleece or interfacing that is fusible. Choose the thickness that you like best. I use Pellon Fusible Fleece in a mid-weight loft. For more information about fusible fleece see the article --> Product Review: Fusible Fleece for Quilting and Sewing Projects.
The instructions include options for adding pockets to the lining and adding a key holder. These are not addressed in this tutorial. Follow the printed instructions if you wish to add these to your Mondo Bag.
For information on fusible fleece read the article, Fusible Fleece for Sewing and Quilting Projects .
Gather Supplies
You will need instructions and interfacing panels to make a Mondo bag.
The Mondo Bag Fun Pack includes instructions along with enough panels to make one Mondo Bag.

The Mondo Bag Interfacing Set includes just the panels.
What You Need
Refer to the instructions that came with your Mondo Bag Kit for fabric and fleece requirements. In addition you will need the following:
Applique Pressing Sheet
Sewing Machine with 1/4″ foot and regular foot
Iron and ironing surface
Thread: Coordinating thread for sewing. Contrasting thread for top stitching.
Sew Outer Fabric Panels
The next video describes all the information printed on the gridded interfacing.Cut the fabric squares according to the Quiltsmart instructions. For each of the four panels you will do the following steps.
The gridded interfacing has two sides. The side with the bumps is the adhesive side. Lay the panel on your ironing board with the bumpy side up. With right sides up, center a fabric square inside each square in the grid.
Arrange the Fabric Squares

Fuse Fabric to Interfacing
Next use the iron to fuse the fabric to the interfacing. The instructions tell you to use steam and press for 5 – 10 seconds. Instead of using steam, I use a spray bottle of starch alternative or plain water.
Lightly spray the starch alternative or water over the fabric. Place the applique pressing sheet over the fabric. Press for 5 – 10 seconds over the entire area. BE CAREFUL! The applique pressing sheet holds the heat for a little while, so pick it up by one of the un-ironed edges.
After the pressing, check that the fabrics are fused properly. Fold the panel along the long and short lines and check that the edges stay in place.
After the pressing, check that the fabrics are fused properly. Fold the panel along the long and short lines and check that the edges stay in place.
Check the long lines.

Check the short lines.
Sew Along Grid Lines
Now it’s time to sew the grid. Start with the short lines.
Fold on the dashed line.

Sew a 1/4″ seam from top to bottom.

Continue folding and sewing all the short lines.
Next, clip on the dots between squares.
Next, clip on the dots between squares.

Along the seams you just sewed, you will clip on the long lines as shown here.

The clipping allows adjacent seams to interlock when the long seams are sewn.

On the ends of each short end, the arrows tell you which way to position the seams.

Now sew each long seam making sure the short seams lay in the direction of the arrows.

Printing along the bottom tells you which way to press the long seams. Press from the fabric side.

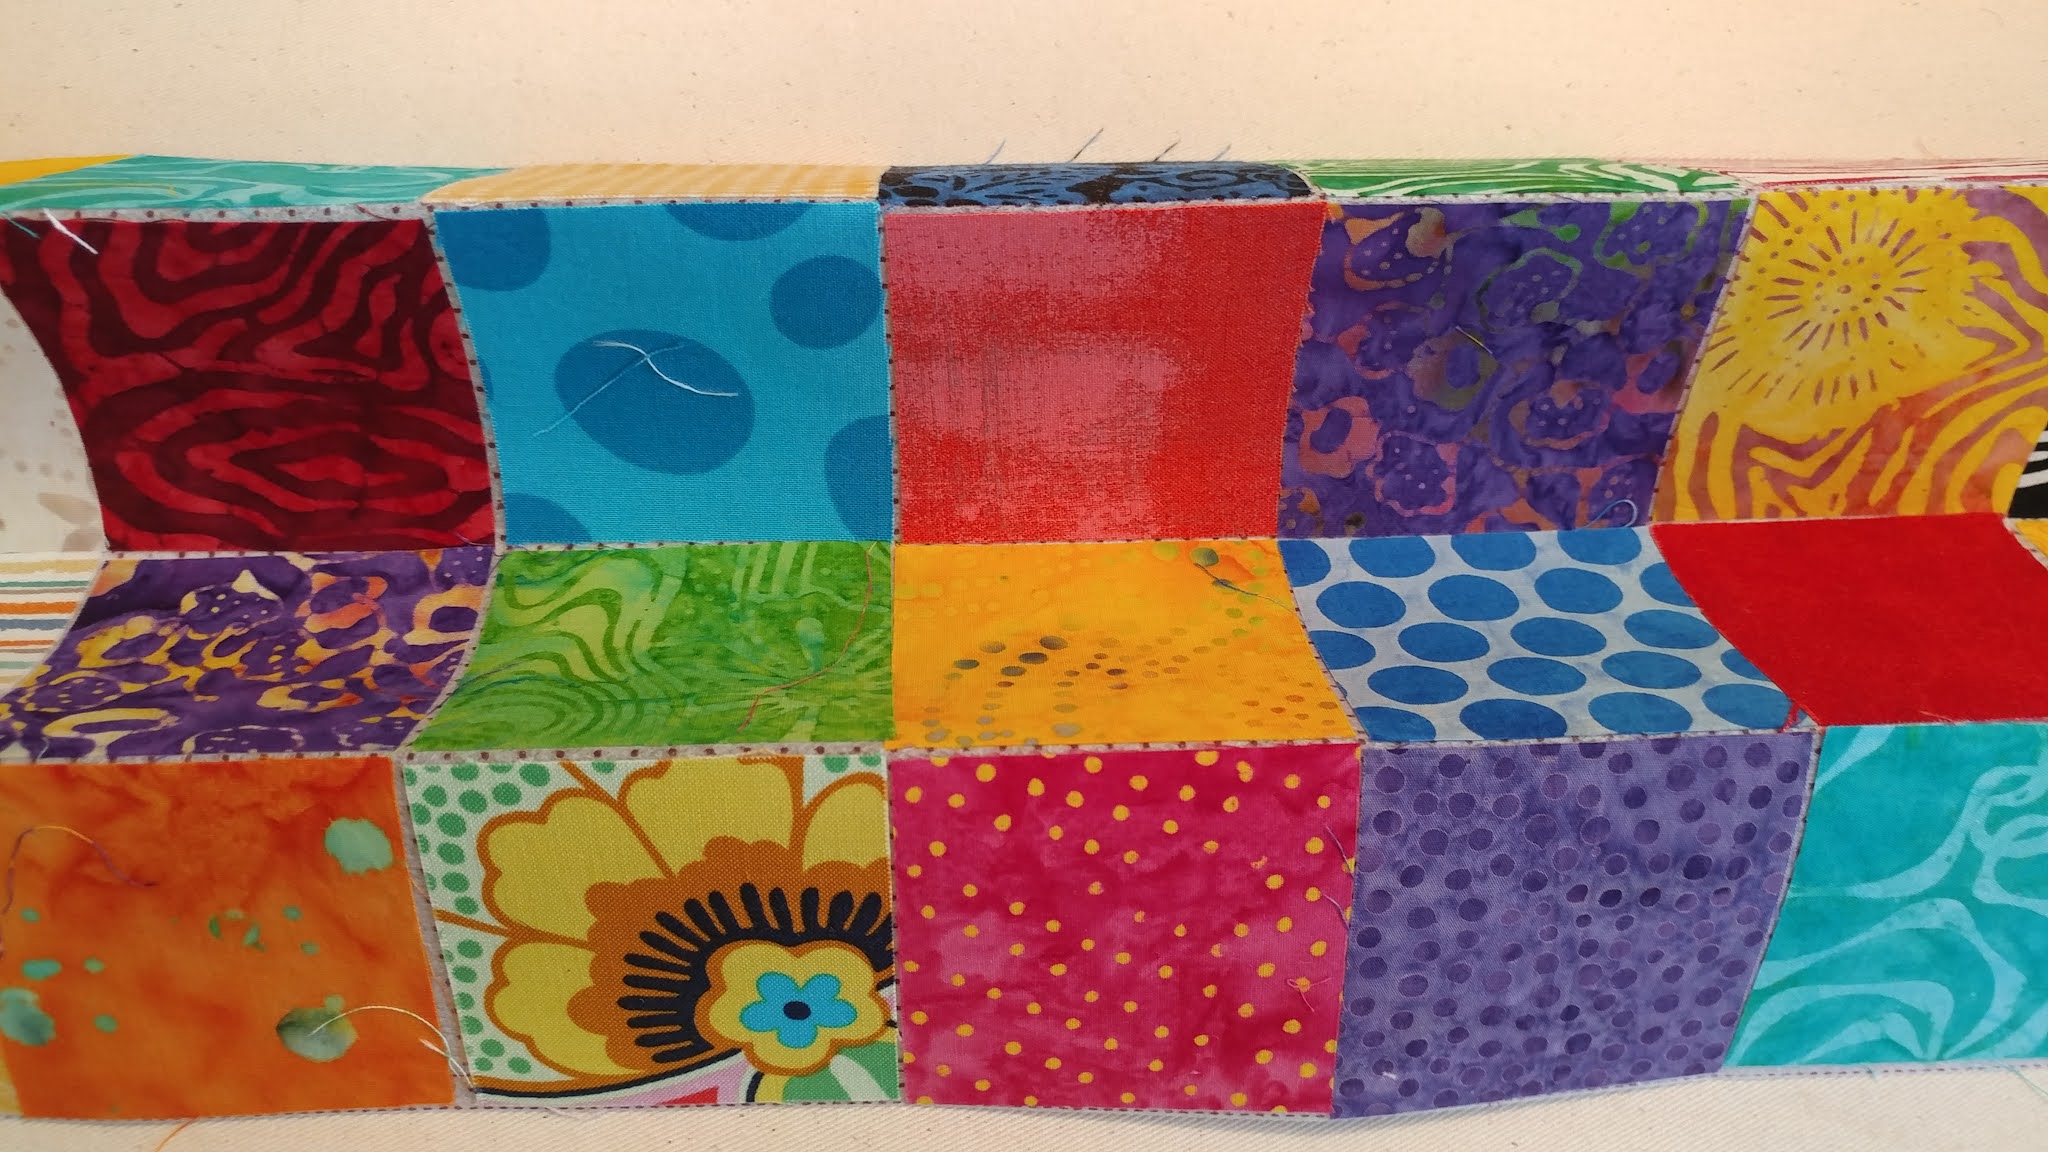
Completed fabric panel. Make 4.
Next, the two “L” shapes are sewn together to form the outer shell.
Assemble Outer Shell
In this step you will sew the 4 panels into two “L” shapes.Next, the two “L” shapes are sewn together to form the outer shell.

Align all 4 of the “Bottom Center” squares. The seams should interlock. Start stitching on the left where you see the two pins. Start at the dot, backstitch then continue to the dot on the right. Press the seam in any direction.

This is what the panels look like after stitching.
Sew the Side Seams
Next the side seams are sewn.After all 4 side seams are sewn, you will have a square bottom and 4 points at the top.
Handles
Fuse a 2-1/2″ strip of fabric to each of the two handle interfacings. I chose to piece a handle using 13 squares for each.
Assemble Lining Shell
Update July 18, 2019 – I found this new video from QuiltSmart. It shows how to prepare the lining and the pocket.The lining shell is made by fusing the fleece to the lining fabric then assembling as you did for the fabric panels. Please note: these instructions do not include the pocket stitched into the lining. If you wish to include pockets or a key ring holder in your bag, follow the instructions provided by Quiltsmart.
Fuse the Lining Pieces
- Following the instructions in Step 5 of the Quiltsmart instructions, cut the following:
- 4 panel pieces from lining fabric
- 4 panel pieces from fusible fleece.
- Cut 2 pieces of fusible fleece each 2-1/2″ x 24″.
- Cut 2 pieces of lining fabric each 2-1/2″ x 24″.
- Fuse all the lining pieces to all the fleece pieces.
Assemble the Lining Shell
Following the same process for the outer shell, assemble the 4 lining/fleece panels into the lining shell.Attach Handles
- Place a lining/fleece handle right sides together with a fabric/interfacing handle.
- Stitch a 1/4″ seam on each long side.
- Turn the handle so the right sides are out.
- Top stitch on each long side.
- Baste the handles to the outer fabric as shown below.

Stitch Outer Shell to Lining Shell
- Turn the lining shell so the fabric is inside and the fleece outside.
- Turn the outer fabric shell so the fabric is outside and the interfacing is inside.
- Place the outer fabric shell into the lining shell, keeping right sides together. This will make it easier to stitch the two shells together.
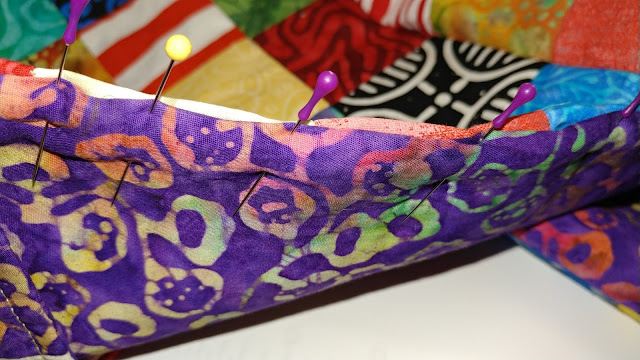
- Pin along all the top edges as shown.

Stitching the Inside Corner
Start stitching just before an inside corner. Backstitch.
Stitch until you reach the horizontal stitching line.

Stop with your needle down and position the bag to continue stitching.
Stitching the Top Point
When you reach the top point with the handle, stop with the needle down.
Pivot the bag and stitch across the handle stitching line.

Continue stitching until the last handle is stitched. Backstitch. Leave the last section open for turning.

Trim Corners and Top Points
Before turning the bag, the inner corners and top points are trimmed.Clip the inner corners in three places: 1/4″ before the corner, 1/4″ after the corner and diagonally into the corner.

Trim out the bulk between the outside clips.

Trim each top point to 1/4″ as shown.


Trim each top point to 1/4″ as shown.

Topstitch
Turn the bag so the right sides of the fabric and lining are facing out. Arrange the bag so the lining is on the outside and the outer fabric is on the inside. This will make it easier to position it in the sewing machine as you top stitch.Close the Side Opening
The opening you left for turning needs to be closed. For each side of the opening, turn under the raw edge 1/4″. Pin the sides together as shown.
The opening will be stitched closed and topstitched at the same time in the next step. Using contrasting thread and a longer stitch length, start with the opening you just pinned and topstitch right along the edge. Continue until you reach the starting point. Secure the threads.
If desired, add another line of topstitching about 1/4″ from the edge.
If desired, add another line of topstitching about 1/4″ from the edge.

Done!
Happy quilting!
Carol
For more project tutorials and videos:
Subscribe to QuiltNotes on YouTubeSubscribe to our blog newsletter